Watch how to soil test on your drystock farm
5 steps to soil testing
This is a general guide to soil testing, watch the video guide above for the full process for soil testing your sheep and beef farm.
Step 1 – Identify your testing zones
- If you've had testing done in the past, it's ideal to test the same blocks, so you can compare data. If you have established blocks, skip to step 2.
- If you do not have blocks in place, you'll need to divide your farm into its various productive units, e.g., effluent paddocks, cropping paddocks, flat grazing land, rolling grazing land and steep hill country. Each of these areas is likely to have a different soil fertility history.
- Next, identify any other parts of your farm that are unique. For instance, that are on a different soil type.
- You don’t need to test every paddock, but it’s important to target all your major farm areas.
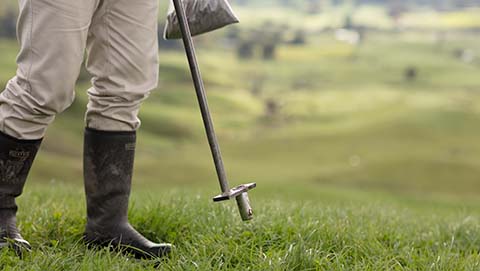
Step 2 – Gather your equipment
- If you’re sampling pasture, use a 75 mm probe.
- If you’re sampling land that will be cultivated, use a 150 mm probe.
- The sampling depth reflects the area of soil that the roots will access.
Step 3 – Take soil samples
- Label your collection bag with the block name, farm details and collection date.
- Collect 15 - 20 soil samples per block and bulk them together in one collection bag.
- Walk the transect and take samples at regular intervals, but avoiding fence lines, water troughs, gates, tree lines and dung and urine patches.
- Take samples to the full depth of the probe.
- Once all the samples from a block have been collected, seal the collection bag securely.
- Repeat process for all blocks.
Step 4 – Fill out the Hill Laboratories form
Once all your sample bags are clearly marked and sealed, you’re ready to complete the Hill order form. The areas you will need to complete are:
- Client contact details
- Ballance property number (this is important as it links back to your customer account)
- Soil sample details
- Total number of samples
- Sign and date
Contact your local Nutrient Specialist if you have any questions.
Step 5 – Send for analysis
Organise your samples to be collected or sent via courier as soon as possible after collection. If you can’t send them off on the day they are collected, store them in the fridge.
To get your soil testing kit and get started contact your local Nutrient Specialist.